Thursday, April 16, 2009

Basement Progress - Demolition


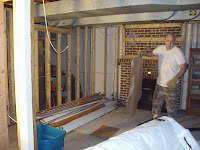
Demolition - how cathartic! Destroying what has annoyed, oppressed, hindered and depressed you altho you didnt realize it until you started to take it all down. Thats how we felt about our existing basement. BUT before the cartharsis could begin, I had to do something with my STUFF! It was actually our family stuff, but my husband made it my responsibility by threatening to throw it all out into a dumpster. Little did he know that his Trailblazers 1977 championship album was in all of that STUFF. I saved him a lot of grief.
First everything was relegated to Save, Toss, and Garage Sale. All "Toss" went as much to Goodwill, Craigslist, and the rebuilding centers as possible. Save was all shelved and organized into the space that would become my new storage room. We did have the garage sale in the Fall and managed to still make a decent amount of money even if it was cold and always threatened rain. Within weeks, everything was stored and organized. (I knew it was if no one else did.) I also commandeered the garage with alot of my office stuff as I had already moved my office home. Risky move according to my husband, but we saved money.
Thanks to our therapist, I was able to schedule my husband's and my time to do demolition after work and on weekends. Kids were babysat and chores that nag my husband were done. We took down the walls of the rec room and various storage rooms. The walls had been constructed of 2x4 plates and studs and clad with tongue and groove paneling. We salvaged most of the T&G to use for my ceiling in my new office. We set out the old studs on the curb for firewood and it was gone quickly. Wood from old shelves was given to a local carpenter to be made into future furniture.
We were able to get all of the remaining demolition debris easily out of the basement by passing everything through a basement window. As I don't mind the rainy, cold weather of the fall, I was on the outside taking everything coming out to the dumpster. My husband stayed nice and dry and not cranky inside the basement. I will suffer through anything if it prevents me from having to suffer through my husband's bitching and moaning. If we were on "Survivor", I would win and he would be voted off after Day 1. We were even able to get the old kitchen-installed style water heater, complete with countertop, up the basement stairs. My husband had a thrill demolishing the old concrete washtub.
We cleaned up after all of our demolition and finished prepping for the new work by covering our vintage 1950'2 turquoise vinyl sleeper sofa with layers of drop cloths and plastic. There was no way we were lugging it around or up the stairs. It had to stay in the basement and would have to survive the remodel on its own.
Our first order of business was to tackle the concrete basement walls. Moisture is an ever present condition in the Pacific Northwest and if basement walls aren't prepped and sealed correctly, one is in for a world of hurt later. Your finish is only as good as your prep so spend the time and effort on prepping your walls. We ran a wire bristle brush over all of the walls, loosening all of the flaked concrete. Once all of the walls had been thoroughly brushed, we applied our concrete sealer. This also acted as a vapor barrier. After the application of the sealer, our basement was looking quite different already. The sealer was white and brightened the space up tremendously. My husband was now finally getting excited about the possibilities for the basement.
One issue we ran into when we sealed the walls was that we were now preventing the usual moisture from seeking its familiar path into our basement walls. So it found new paths to come into the house via our galvanized water pipes. It didn't help either that our framer brought in wet wood. But it is the NW and lumberyards get rained on. We were not spending a fortune on the best, most expensive kiln dried wood either. To keep moisture low, we rented a dehumidifier. As the framed-up lumber dried and the insulation went in, the moisture stopped. Having the sealer and the insulation vapor barrier create an insulating air pocket that is kept at the proper temperature osmotically by our heating system, moisture is not attracted inside to our basement living space. The house is also not tightly sealed so it is allowed to breathe and naturally regulate itself. I liken this to preventing condensation on windows at an indoor pool. If the room is the same temperature as the pool, condensation does not form.
I am getting ahead of myself in this saga. We must go back to the concrete cutting for the large egress window of my office and the trenches for the new plumbing for the laundry and bath. That was a huge wet mess, but totally worth it. I was now going to have a 3'wide by 4'high daylight window for my new office. I myself crammed into the window well and dug out the addtional 12+" needed to accomodate the new window. I'm sure my neighbors were wondering what I was doing.
Once the trenches in the concrete floor were cut, the kids and I dug out all of the dirt filling up (3) 32 gallon trash cans and (1) 54 gallon roll carton. On the last day of digging, my husband found a horse foreleg and an empty bottle of whiskey. What kind of story would that tell? the leg looked a little gnawed on. We saved the items for a diarama for our finished basements decor.
The plumber came and plumbed everything out. We passed rough-in inspection and set to work unloading all of the cans of dirt back over the new plumbing lines. Naturally we had dirt left over and had to haul a 32 gallon trash can upstaits and outside. I think my husband hated me that day. We put our accumlated dirt that had been underground for 75 years and brought it topside. I wonder what it would say if it could talk? It is now part of our landscape and enjoying its new accomodations.
The concrete guys came back and filled in all of the trenches. A difficult stage was done. Next we were on to electrical and HVAC.


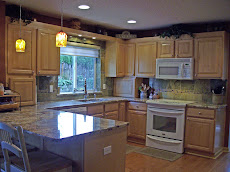


Basement Remodel in Progress

Have you wondered about remodeling your basement? Could you use the extra living space? Would it improve the value of your home and would you get the bang you require for your buck? What are the things one needs to consider when remodeling a basement?

As a designer and a contractor, you think it would be a no-brainer for me to remodel my own basement; power for the course. What really happens with most people indulging personally in their own professions is that old adage "the cobbler's family has no shoes." When I started my business out of my house, my mother was famous for coming in and saying, "I hope you don't have client meetings at your house." While I am making my clients' design fantasies come true, my house is pretty much as it was when we moved in 8 years ago and added on to with 3 kids, 2 dogs, various rodents at various times, an outdoor cat, and 3 chickens. Oh, and did I mention I love gardening? Iwould much rather dig in the dirt than housework. And my husband and I are very good at avoiding house work if we can play instead. So you can understand my mother's sentiment however rude and unsupportive. Could we commit and stay invested in a remodel to the end? I know if it wasnt for my husband, I would be happy still living out of cardboard boxes and consider piles of things as "organized".

This brings me back to the question of whether remodeling my basement was a no-brainer for me. It wasn't. I had to review with my husband - were we ready to commit mentally and physically? We had to review why we wanted to remodel our basement. The economy we had when we started(2008/2009) was a big factor. I was downsizing my design office and moving it home. (The design & construction industry was screeching to a whiplash halt and the overhead would've killed my business.) I needed a home office. Our children were outgrowing their 10'x10' playroom which also doubled as my husband's home office. We needed an additional bathroom and I secretly fantasized about a laundry room where we didnt have to pick our laundry up off of a concrete floor under the light of a bare bulb nor have to walk around our main sewer waste pipe to put the washing into the dryer. We had to review our finances. We came to the realization that if we didn't do the remodel, we couldn't function as a sane family and I couldn't run my business professionally. And, in our neighborhood, a basement remodel would significantly increase the value of our home instantly. It was a sound investment. This, in a way, made our decision a "no-brainer". "We" became one of my clients.

I had to design within a budget event though it was my own house because we couldn't afford the real showplace all people think designers should be living in. So, I had to come up with a "showplace" design on a budget. That was usually power for the course with every project I worked on. To keep costs down, we did a lot of the labor ourselves. As a contractor, I was used to that, but my husband was not. He is a "nervous nelly". Nervous about tackling big jobs he knows nothing about and nervous about me because he knows how I like to jump feet first into any project and figure out what to do next... next. My husband is a perfectionist and I am a one-foot-in-front-of-the-other-til-its-done-ist. To date, we have worked together well with only a few arguments that we took to our therapist. I have come to appreciate my husband's perfectionism and he has come to respect my ability to create something out of nothing, make it work, and make it look great! He trusts me more now and I have developed more patience for his insistence on thinking things through til he feels comfortable progessing on with the project. My husband only has Plan A, where I am always armed with Plans B, C, D, E, etc when I start a task. Plan A usually costs less money altho Plan B should be considered as well at the start of any new task. You see things you didnt see before in the design/planning stage. I do believe in the evaluation of each task before starting ; cross t's and dot i's. I have a good example of this further in the remodel blog.

In evaluating the feasibility of our basement remodel, we had to consider the following as anyone should when thinking about their basement viability:

Ceiling Height -high enough for code and livability?
Light - natural and artificial - what can you handle?
Safety Egress - if you are having a family room or bedroom in the basement- code.
Flooding and dampness - possibility of sewage back-up or dampness that could cause mildew,
mold and other bio-hazards.
Potential for a bathroom and/or laundry
Consideration of an apartment use or duplex use - check all building codes and confer with a
contractor or architect.
Accessibility from main living areas of the house
How will you heat and vent the space?
Existing electrical and plumbing conditions - acceptable or total re-do?

After our initial due diligence, which turned out all favorable, we proceeded with the design for our basement. Our basement was semi-finished with an old 50's rec room and some T&G paneled storage rooms. We designed for my office to be in the old rec room space (with existing fireplace), a storage room under the stairs (always a good place for storage, bathrooms, or wet bars), a family room for the kids with adjacent bathroom, laundry room where existing laundry was, but with a better configuration, and a giant storage/utility room for all of my STUFF. Heaven! A girl loves her simple pleasures.

Finishes would be simple, affordable, but dynamic and a showplace for future clients. I am a designer after all. We also had to consider keeping the basement light filled and well-lit. I grew up playing in a dungeon basement and totally did not want my basement and my office to feel that oppressive. We would do as much of the work as possible and re-use materials as we could. We would also shop sales, the rebuilding centers, and wheel and deal with my suppliers. We would also try to keep our marriage together through this remodel - a true test of the stability of any relationship.

The following progress pictures and reports show how we did all that we set out to do. At the end, I will reveal how much everything cost and how long it took us to complete. Please read additional blogs posted for more information.